-
Step 1: Measure the Space That Actually Exists
-
Step 2: Choose the Right Inflatable for Your Audience
-
Step 3: Verify Power Before You Commit
-
Step 4: Zone the Layout, Don't Just Scatter Units
-
Step 5: Send Files That Can Actually Be Opened
-
Step 6: Plan the Labor—Not Just the Equipment
-
Step 7: Budget for the Boring Stuff
-
What Most People Still Get Wrong
As the operations manager at a family entertainment center, I've been handling commercial inflatable orders since 2019. I've personally made (and documented) 23 significant mistakes, totaling roughly $18,000 in wasted budget. Now I maintain our team's checklist to prevent others from repeating my errors.
This article is that checklist, written for venue operators planning a commercial blast-zone area—a dedicated bounce section, a party space, or a seasonal pop-up. It's not about residential backyard bounce houses. My experience is based on about 40 commercial orders for family entertainment centers. If you're building a full outdoor water park, some of this applies, but your list is going to look different.
The list has 7 points. Work through them in order before you place an order.
Step 1: Measure the Space That Actually Exists
The mistake that cost me $1,400 happened in my first year. I ordered a 20-foot commercial slide for a room with a 16-foot ceiling. It didn't fit. It wasn't close. I had measured the floor area, the doorways, the wall clearance—everything except the vertical space.
A lot of buyers focus on square footage and completely miss ceiling height, door swing, and the path from the delivery dock to the setup area. The question everyone asks is, 'How big is the room?' The question they should ask is, 'What's the unobstructed envelope from the street to the anchor point?'
That means measuring more than the room. Measure the hallway. Measure the elevator. Measure the service door. In 2022, a neighboring venue ordered a commercial slide that cleared its room but not the corridor leading to it. The unit sat in its crate for two weeks while the hallway was partially disassembled.
Checkpoint: Measure height, width, depth, and entry path. Write them down. Then measure again.
Step 2: Choose the Right Inflatable for Your Audience
From the outside, all commercial bounce units look similar. The reality is that a blast zone bounce unit built for toddler parties is a different machine from one designed to absorb the chaos of a teen group event. Different materials, different anchor configurations, different weight limits.
Define your primary audience before you compare models. Our venue serves a mix of birthday parties and school groups, so we went with blast-zone products for their commercial-grade construction and themed designs. But the purchase only worked because we matched each unit to a specific age group and event type.
Five years ago, the categories were simpler: bounce, slide, combo. Now you've got themed play palaces, water-ready hybrids, and obstacle courses that blur every line. That's a good thing—but it makes the 'who is this for' question more important, not less.
Checkpoint: Write down your peak demographic. Pick units rated for that group's size and activity level.
Step 3: Verify Power Before You Commit
The power layout disaster happened in September 2022. We planned to install inflatables in one section of the building and add a small active corner nearby. I almost put a NordicTrack Commercial 2450 treadmill in that corner—a 'family fitness' idea that sounded good in a meeting. Then the electrician pointed out the math: the treadmill plus two 15-amp blowers on the same circuit would trip the breaker every 45 minutes.
Why does this matter? Because inflatables run on continuous-duty blowers. If a circuit is shared with other equipment, you'll reset breakers all day—or worse, the blower cuts out mid-session and the unit deflates.
The 2450 is a fine treadmill, by the way. We just learned that 'fine equipment' and 'right equipment for the space' are different questions. The corner ended up with a few arcade games instead, which draw a fraction of the power and take up half the space.
Checkpoint: Count amps per blower, map the breakers, and add a dedicated circuit if the numbers are tight.
Step 4: Zone the Layout, Don't Just Scatter Units
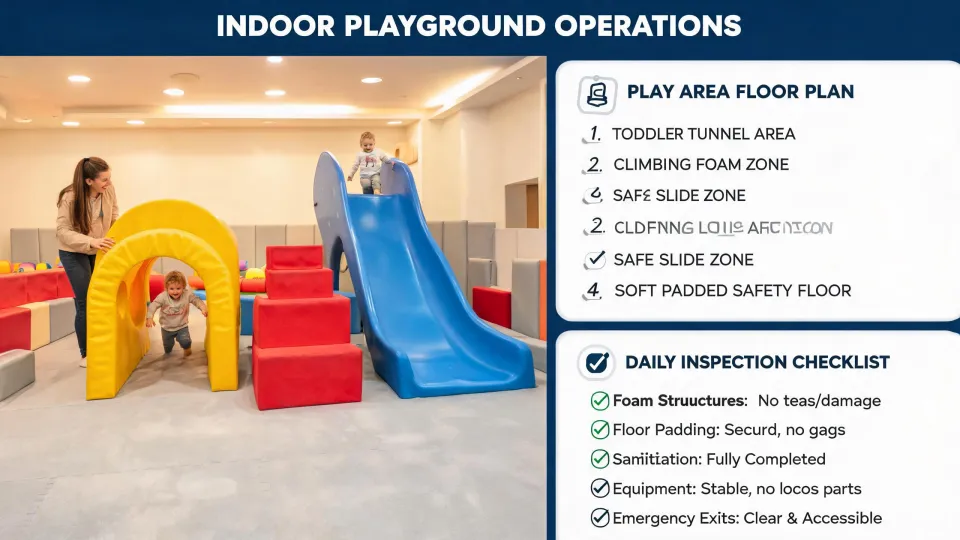
When you picture a blast-zone layout, it's tempting to think fun first: bounces here, slides there, games everywhere. But the layout is really about separation. Our Iron Blast game zone—the high-energy obstacle area—works because it's physically buffered from the toddler zone. We found that out the hard way when a 3-year-old wandered into the bounce zone during a teen birthday event.
Draw the foot traffic flow before you finalize anything. Put the loud equipment together. Keep the calm zone separate. If you can't create a buffer, create a schedule that separates noisy and quiet sessions.
If you ask me, this is the step most first-time operators skip. They order great units and then place them wherever the delivery crew drops them. That's how you end up with a water slide next to the party tables and a bounce house blocking the emergency exit.
Checkpoint: Draw a traffic diagram and identify crossover points.
Step 5: Send Files That Can Actually Be Opened
I searched 'how to download a Google Slide' at 11 p.m. on a Tuesday, after a vendor told me they couldn't open my layout link. I had prepared the presentation in Google Slides and shared a link. It worked on my screen. It didn't work for them. They didn't chase me; they worked from my email text instead. The result was a configuration I hadn't approved and a three-day delay.
If a vendor says 'send the layout,' send a file. A link isn't a file. If you're not sure how to download a Google Slide to a shareable format, it's a 30-second task: File → Download → PDF. The 30 seconds are worth more than the three days I lost.
This goes both ways, honestly. We now ask vendors to confirm they can open our attachments before we finalize anything. It sounds like common sense. Common sense had to be learned. (And yes, I still have that link in my Drive. I keep it as a reminder.)
Checkpoint: Attach one PDF per document. No links.
Step 6: Plan the Labor—Not Just the Equipment
People assume setup is gonna be just hauling the unit out and plugging it in. The reality is anchoring, inflation, safety checks, teardown, and storage rotation. A standard commercial unit takes 45 to 60 minutes for two staff members. Four units means four hours of labor before the doors open.
The lesson came from a June 2024 school break event with six units. We had one crew for setup and teardown, and they were exhausted by day two. The event ran fine, but only because we built in buffer time. The week after, I added a labor line to every quote.
Since I wrote this checklist down in Q1 2024, we've caught 47 potential errors before they became real problems. The most common? Underestimating labor. It's not an equipment problem; it's a planning problem.
Checkpoint: Staff the setup window at double your first estimate.
Step 7: Budget for the Boring Stuff
Spare blowers. Patch kits. Tether straps. Anchor weights. Extra extension cords. They're not glamorous, but they're the items that save a Saturday.
I once spent $300 on a Catan board game set for the parent lounge, thinking it would be content during multi-hour parties. It got played once in eight months. The $80 repair kit I also bought has been used five times.
To be fair, the lounge still has the game, and some parents genuinely enjoy it. But if you ask me, spend on maintenance before décor when the budget is tight. A commercial-grade blower runs roughly $400 to $900, based on quotes I collected from three suppliers in January 2025. Verify current pricing—but budget at least one backup.
Checkpoint: List every accessory needed for a full-cycle event, then add one spare blower.
What Most People Still Get Wrong
Three footnotes worth printing with the checklist:
- Insurance: Check your liability policy before the first event. Inflatables change your risk profile, and some policies require specific naming or inspections.
- Manuals: Read the manufacturer's manual for every unit. Per ASTM F2374, the standard for inflatable amusement devices, you need to know your anchors, weight limits, and operating conditions.
- Paperwork: Keep the invoice, the manual, and the safety checklist together. You'll need them at inspection time.
The fundamentals haven't changed since 2020: measure properly, plan the power, and send files that open. What was best practice in 2020 is still the baseline in 2025, but the execution has transformed. New fabrics are lighter, blowers are more efficient, and themed zones like the Iron Blast game zone are becoming standard in commercial venues. Use the new tools. Keep the old discipline.
That's the checklist. Seven points, ordered by the cost of the mistakes they prevent. Print it, stick it on the wall, and measure twice.